Curated Lists allow you to group your organization's books in a way similar to how individual users create virtual bookshelves. With these lists you'll be able to group similar books together and even grant access to all books on a particular list with a specific group of users that you've setup in the Library Members Permission Groups settings.
You can create as many as you need, put as many books in each as you'd like, and re-order them to whatever sorting works best for you, so use this help article to guide you through all the different things you can use Curated Lists for in your organization.
Topics covered in this article:
Creating a Curated List
Sorting Curated Lists
Sorting Books on a Curated List
Managing Curated List Visibility
Creating a Curated List
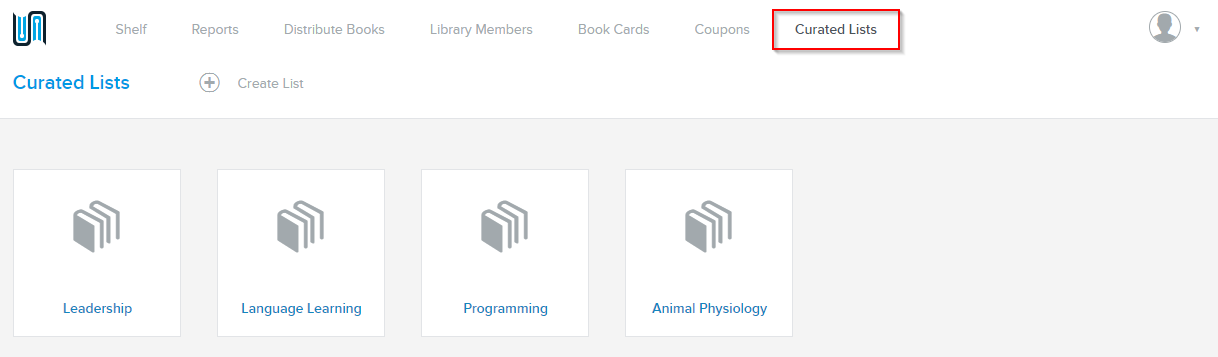
To create a new Curated List you'll start by navigating to the Curated Lists page using the link in the top navigation bar. From here you will see any lists that your organization has already setup as well as an option to "Create List", so that's what we'll be doing in this example.
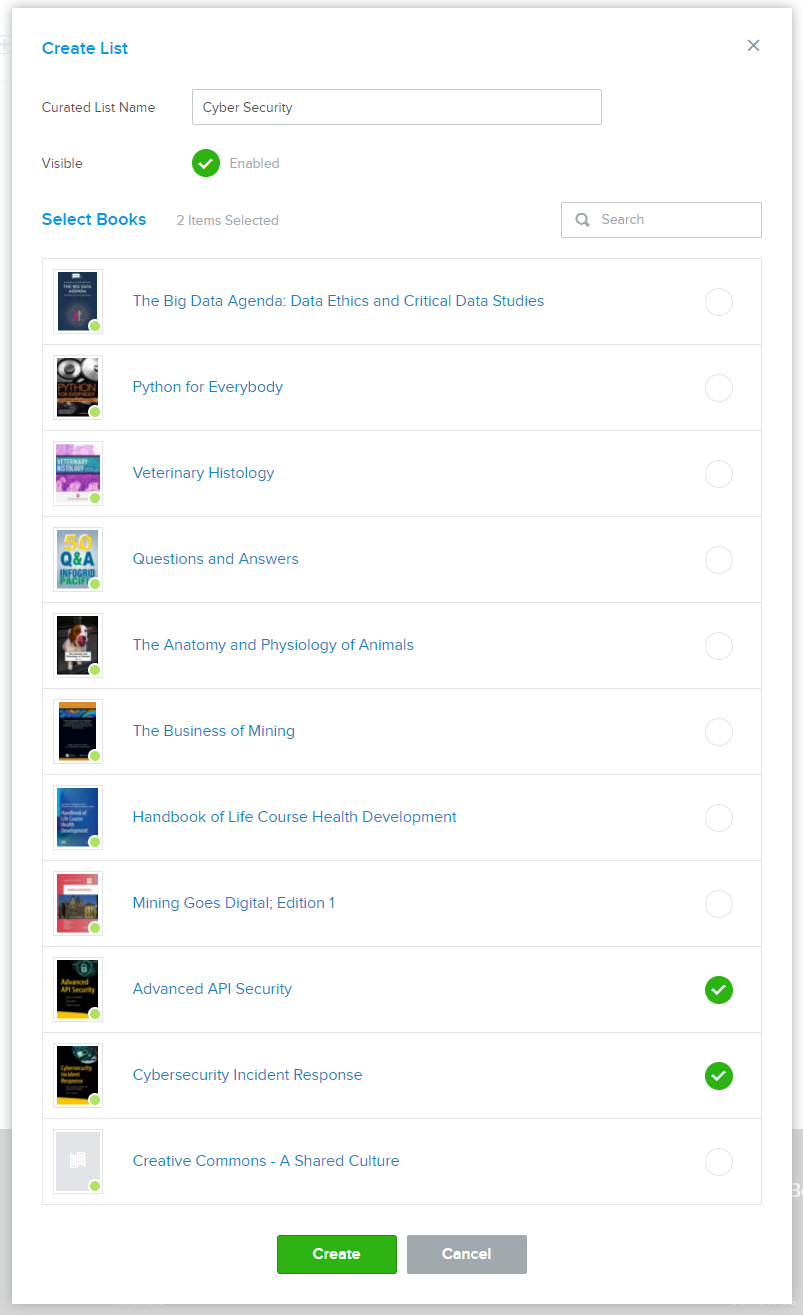
After clicking the "Create List" option you'll be given a pop-up that allows you to configure the new Curated List you're wanting to add. On this screen you'll be able to give your new list a name, advise if the list should be visible to all the members of your library by default, and then let you pick the books you want to display on that list. You can check as many as you'd like, and if you have a larger library you can make use of the Search field to quickly find the titles you want included.
In this example I'm going to create a "Cyber Security" Curated List, leave it public for everyone in my organization to see, and select the two books I recently uploaded that are a good fit for this topic. Once all this is done, I'll just click the "Create" button and it's all done.
Once your list has been created you'll be taken to it and shown the books you added during the setup, and you can always add more books if needed from this screen as well.

Sorting Curated Lists
Curated Lists will always add the most recent list to the top of your organization's page as a way of showcasing new content, but you can always rearrange your lists to any order you prefer. In the animation below you'll see that the new Cyber Security list is the first one, but I'm going to click and drag it to the second spot so I can keep the Leadership list in the first position. These changes are saved as you go, so once you have them in the positions you'd like there's nothing else you have to do.
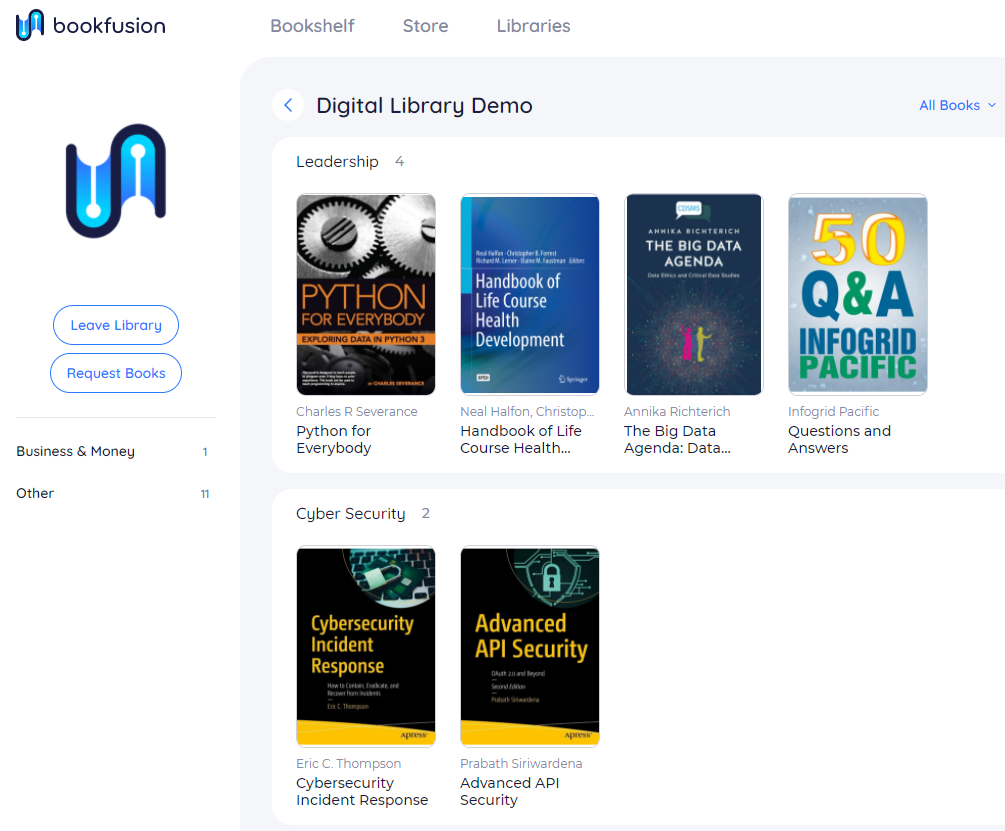
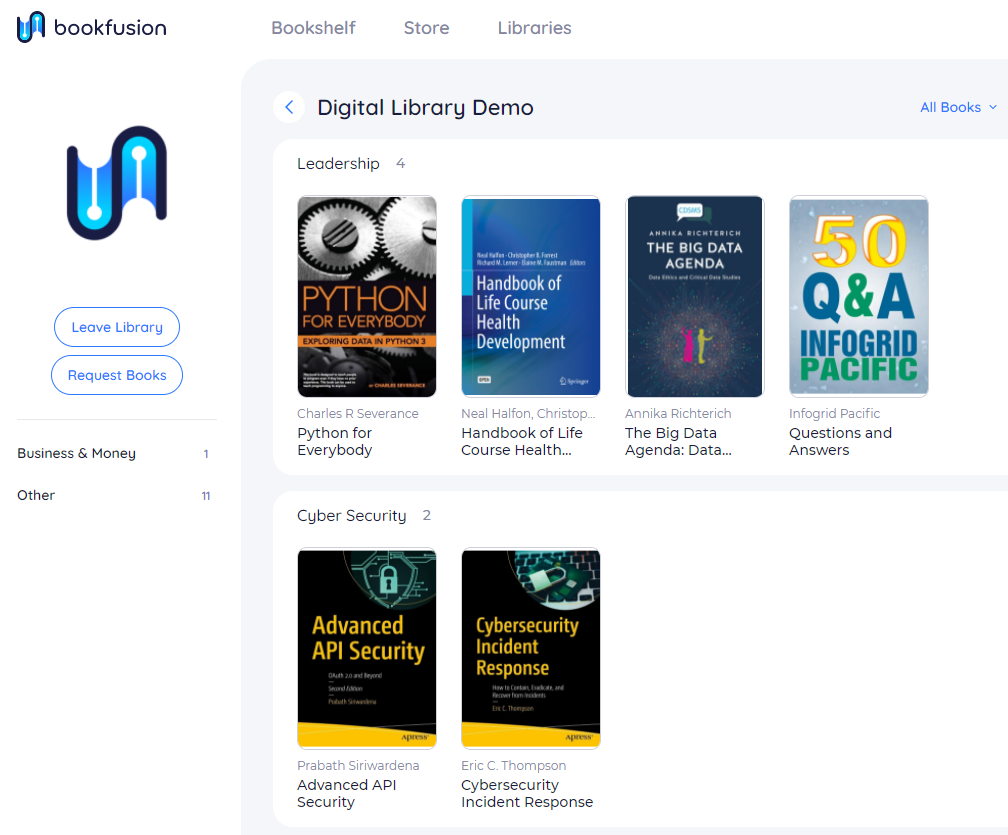
How will this appear to your library's normal users? Good question! When they browse your library they'll see these Curated Lists just like a virtual bookshelf in their own library, so below you'll see that the Leadership books are at the top and right beneath them are the new Cyber Security books we added in this demonstration.
Sorting Books on a Curated List
Similar to the ability to arrange your Curated Lists, you can also arrange the books you've placed on those lists. When you open a list to see the books that are on it, moving books into a different order is as easy as clicking and dragging them around until they appear in the desired order.
Your library's users will see these updates immediately, as seen in the below screenshot where the "Advanced API Security" title is now the first book shown on the Cyber Security list.
Managing Curated List Visibility
Sometimes you will want to make a few of your library's books available only to select individuals, and this is possible by adding those books to a Curated List and then granting permissions for that list to one or more Permission Groups.
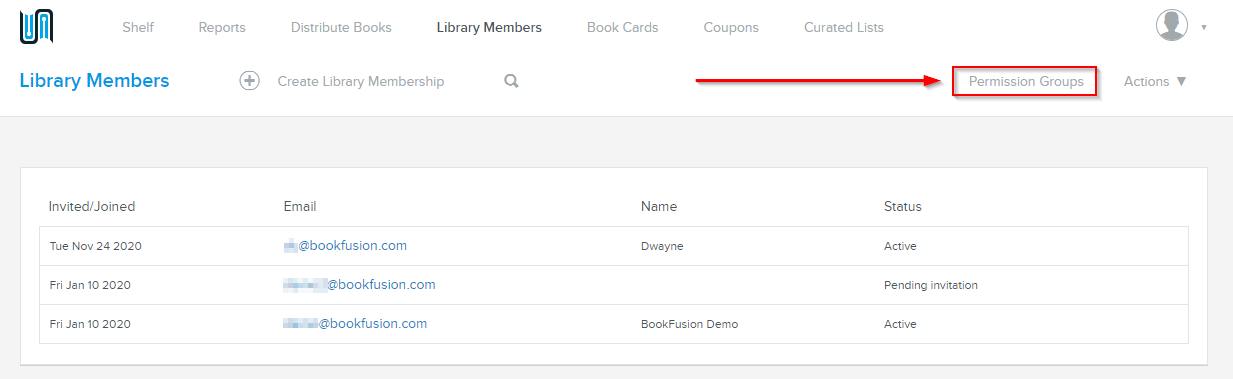
To restrict access to a specific list of books, we'll need to start by going to the Library Members screen which shows everyone who has access to your organization's library. Once you're on this screen, look for the Permission Groups link to take you to that page.
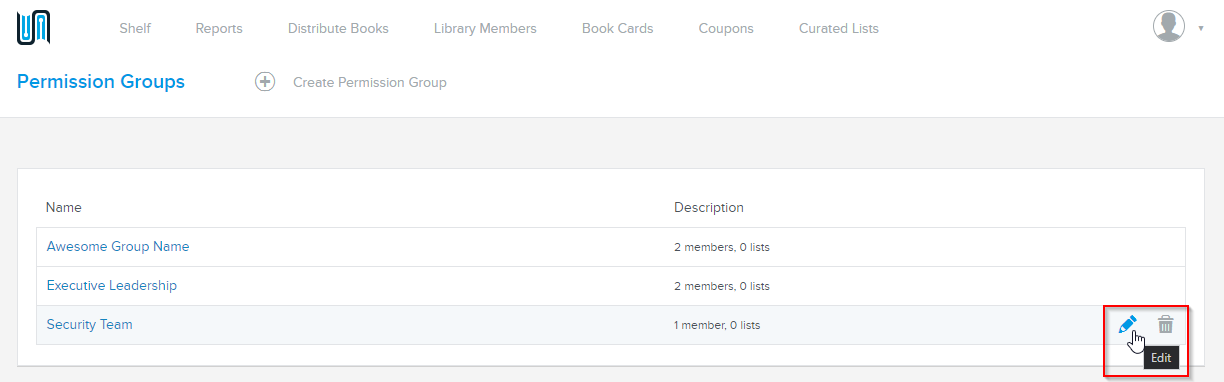
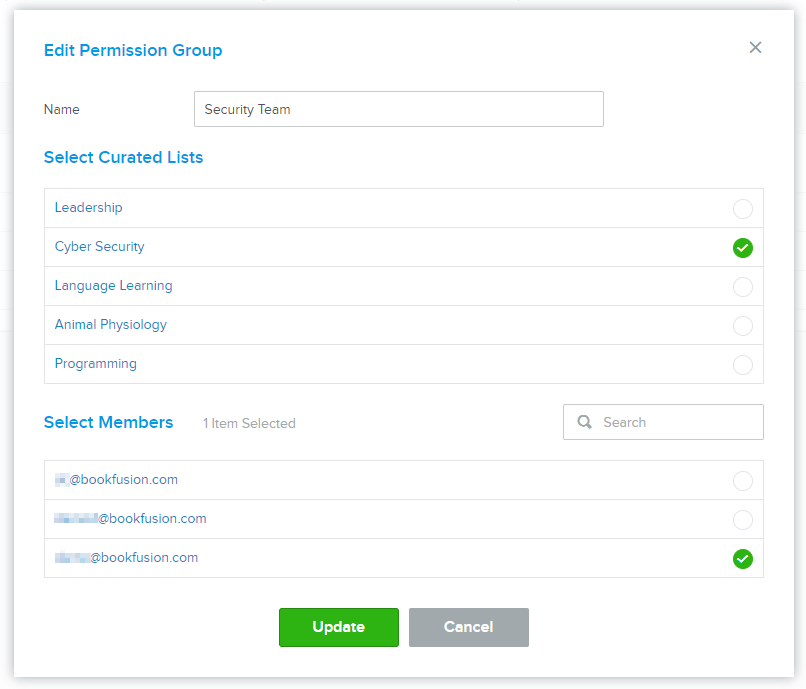
For this example I already have a Security Team group setup, so I'm going to click on the pencil edit icon for that option in the list of available Permission Groups. You can see in the description that this group only has 1 member and currently 0 lists are assigned to it - we'll change that next.
Once the edit screen is up you'll be able to see all the Curated Lists you've created as well as all the members of your library; from here you can choose which lists you want this group to have access to and then who should be in this group. For this example I'm just going to give the Security Team access to the Cyber Security list we created earlier, and I've just put one library member in the group. Click "Update" to save your changes and you're done.
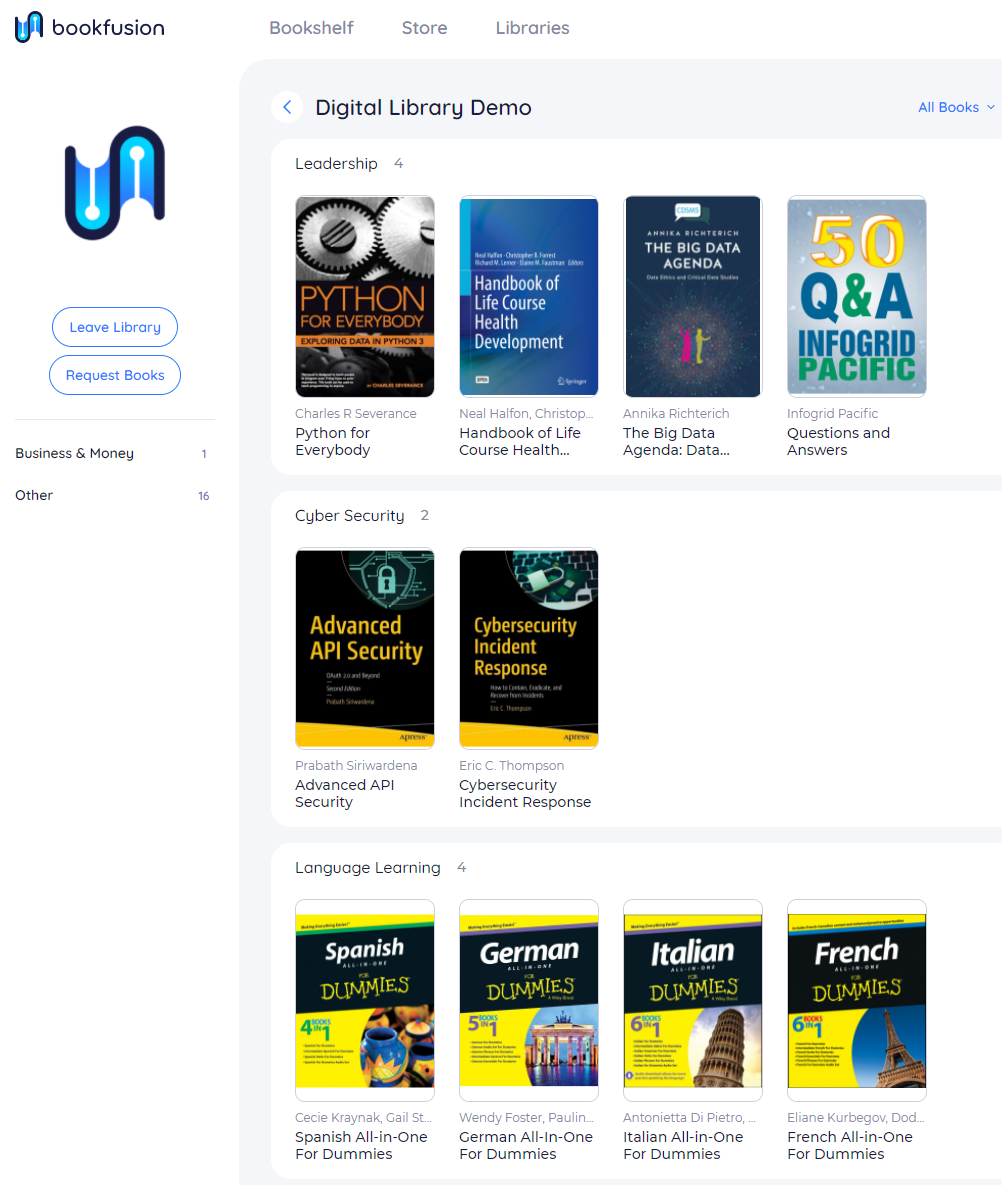
If a user is in the Permission Group they'll see the Cyber Security list and the books that are on that list.
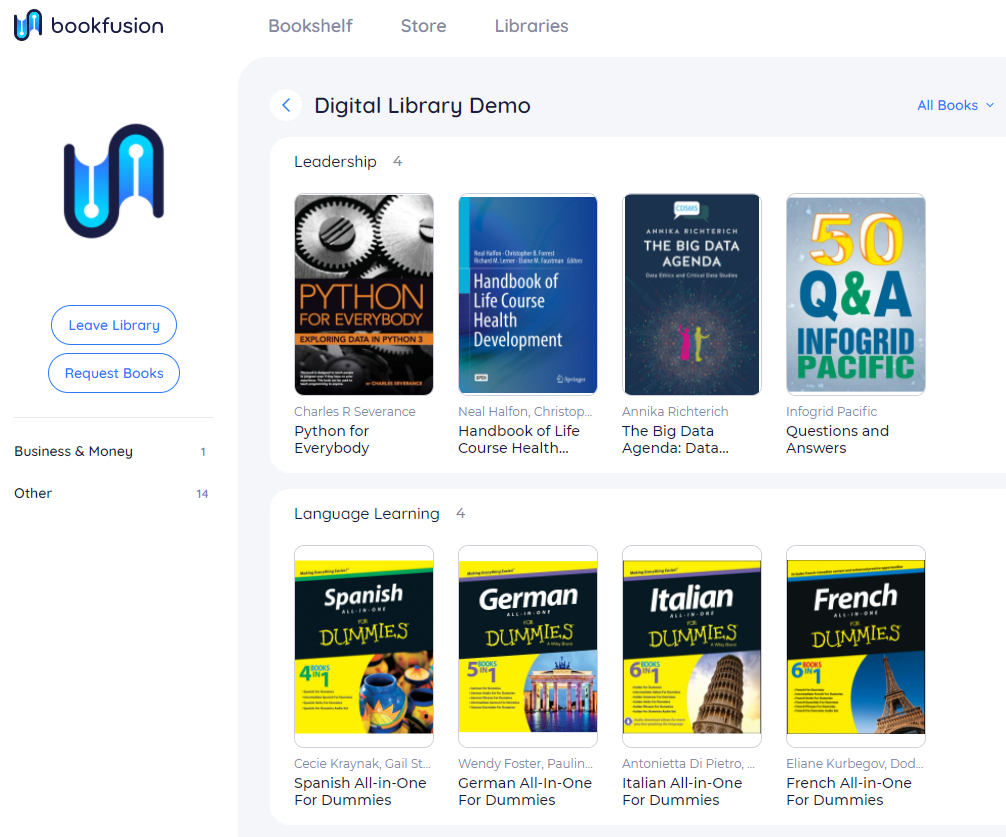
If they are not in the Permission Group they won't see that list or have access to the books on it.
You can do this with as many lists and books as you'd like in order to provision them to select members of your organization when needed.
Comments
0 comments
Please sign in to leave a comment.